Chapter 2
First Explorations
The first problem is to decide which direction to set off in: we've a whole ocean of opportunities to explore. Well, Chapter 1 included some mention of picture sizing so we may as well finish that bit off.
The coding for the picture is your version of -
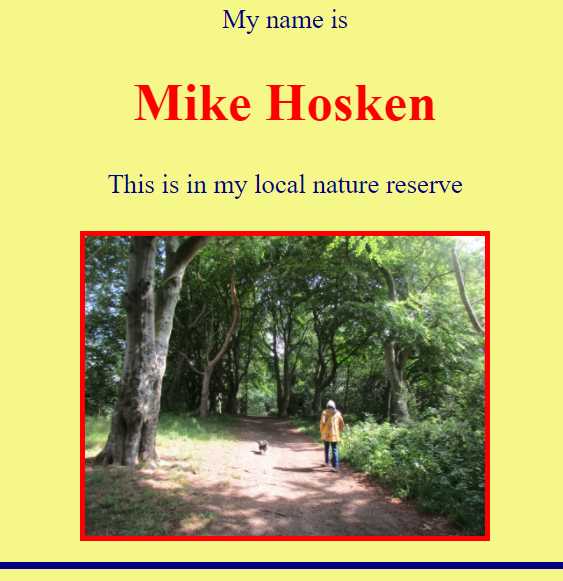
<img src="beechwoods.jpg" width="600" alt="Walkers in the beech woods.">
EXPERIMENT !
- Change 600 to 60, save the file, and see what happens when you 'refresh' or re-launch it.
- Change width="60" to height="600", save the file, and re-launch.
- Add back the width measure: it's then <img src="beechwoods.jpg" width="600" height="600" alt="Walkers in the beech woods.">. Your picture will be shown square, regardless of its original shape.
- Finally, try width="1000" height="80". It works but seems pretty useless. Yes, it is - with your photo. But you might sometime have an image of a red square. You can decorate your page by making it like a wide line across your page or a tower up the page simply by changing the height and width measurements (in any order).
What shall we do next? How about getting all the items moved to the centre of the page? Dead simple!
Remember div? - a division of the coding? We can tell it to put everything into the middle of the page simply by adding a style command.
<div> becomes <div style="text-align:center;">
We shall have to get used to putting in a variety of style instructions, so notice it starts with the unit to which it applies (div in this case), then style=" and ends with ;", all within the usual angle brackets. You'll immediately notice when you try it for yourself that in fact it centers everything, not just text. (Note the American spelling: "centre" simply won't work.)
text-align can be used to produce a number of different alignments: the most generally useful are left, right, center and justify. They are all detailed on
https://developer.mozilla.org/en-US/docs/Web/CSS/text-align.
OK. But let's get the actual text on our site a bit bigger, and more colourful while we're at it. Changes can again apply to everything within our one-and-only div. Size first.
<div style="text-align:center;"> can have font instructions added to it, within the same inverted commas. Add font-size:40px;
<div style="text-align:center; font-size:40px;">
Save it, and refresh your web page.
px stands for pixels: the best way of finding the ideal size is by trial and error. But it's not the only kind of measure available: em is a common alternative. 1 em is about 16 px, so we're not restricted to whole numbers: it may be font-size:3.2em; for example. Again, see all the options on
https://developer.mozilla.org/en-US/docs/Web/CSS/font-size.
Having got the size we prefer, there are other font characteristics that can be controlled too. If you want to add extra refinements you can take your pick from these, amongst others:
https://developer.mozilla.org/en-US/docs/Web/CSS/font
https://developer.mozilla.org/en-US/docs/Web/CSS/font-family
But there are some quick and easy text changes that can be made anywhere you like, even in part of a word.
Insert <i> where you want text to be in italics, and </i> to cancel.
Insert <b> where you want text to be bold, and </b> to cancel.
Insert <u> where you want text to be underlined, and </u> to cancel.
Insert <s> where you want strikethrough text, and </s> to cancel.
You might care to try something like <b><u>This</u></b> is in my local nature reserve.
But don't try <bi> if you want bold italics: you need <b><i> to start and </i></b> to cancel and so on. (They can be in any order, but with many other controls it's essential to close the 'innermost' item before closing the outer ones - </u></b> rather than </b></u> if you did modify This. Develop good habits!)
There's another way of changing font size and prominence, designed essentially to provide easy headings so they automatically supply their own spaces both before and after. As headings, they're known, logically enough, as h1 (largest), h2 (more modest), h3 (smaller), down to h6.
Why not make your name stand out? You can delete the now-unwanted <br> items so the section of coding will be like this:
My name is
<h1>Mike Hosken</h1>
This is in my local nature reserve<br><br>
As usual, make the change to your listing, save it, and then refresh your website display. Better? Feel free to experiment with h2, h3 and so on.
It's about time we thought about some colour - or color (American spelling) as we must get used to typing. There are all sorts of sophisticated ways of specifying the millions of colors that computers can (usually) display. Coding can involve specifying three numbers, for the red, green and blue components, usually amalgamated into # followed by 6 hexadecimal digits (using letters a to f as well as the usual 0 to 9). If you wish to or need to know, start at
https://developer.mozilla.org/en-US/docs/Web/HTML/Applying_color.
We'll take the easy way out for now, using the accepted range of colour names. There's a wonderful display of everything at
https://www.cssportal.com/css3-color-names/.
The main ones are aqua, black, blue, fuchsia, gray, green, lime, maroon, navy, olive, purple, red, silver, teal, white, and yellow. Notice they're all in lower case (as usual) and with the American spelling for gray.
So take your pick. As illustration I'll assume you'd like the text to be in dark blue, ie. navy. It should apply to the whole div so -
<div style="text-align:center; font-size:40px; color:navy;">
(You begin to see why the semicolons are helpful.) Choose some other color if you prefer. Easy!
But then we have a change of mind perhaps: having the name in red would make the name stand out even more. Fortunately we don't need to break up our div into smaller divs to achieve this. As it's only - and the whole of - the h1 that we want to change, it can have its own style.
<h1 style="color:red;">Mike Hosken</h1>
If we had wanted the color change to apply to lots of separate items we could have used span. Just to show how it works, put <span style="color:red;"> just before the word "is" and </span> just before the word "reserve". When you activate that you'll find "is Michael Hosken This is my local nature" are all in red. (No actual use here but we will use it in Chapter 5.)
But before we finish with colors, can we improve on the plain white background of the whole page? Yes, of course. But we probably wouldn't want to use any of the strong named colors. How about a gentle sort of creamy color background?
Go online and Google or otherwise find yourself a "color picker". It will display a fantastic range of colors, all grading into one another. When you put your cursor on the color you fancy it will also display its six-figure code number. (Again, it will be in hexadecimal so it may include letters A to F as well as numbers: don't worry about it!) But when you come to use it you must put a # in front.
I'm no artist, and in any case I've no idea what background might best suit your text and picture. But I'm going to try
EITHER <div style="text-align:center; font-size:40px; color:navy; background-color:#f5f788;">
- controlling the division
OR <body style="background-color:#f5f788;">
- controlling the whole page which has the same effect as we have just the one div filling the whole body.
So, we're getting on! But the picture would look better with some sort of frame or border around it. There are innumerable options available but we'll keep things simple, for now at least. We'll just style a solid border 8 pixels wide, colored red. The whole img detail is then -
<img src="beechwoods.jpg" width="600" alt="Walkers in the beech woods." style="border-style: solid; border-width: 8px; border-color: red;">
But as always, you can make your own choices for your website.
Finally (though it's not the end of the Chapter) it might be good to have a colored line across the bottom of the page to give a neater finish. We'll put a <br> after the picture to open up a bit of space and then -
<hr style="border-style: solid; border-width: 10px; border-color: navy;">
- where hr stands for horizontal rule. Feel free to experiment with details.
(You may be curious as to why the horizontal rule isn't just a line of some width, some thickness and some color. The way it's done in coding is simply to draw a border round nothing at all!)
And we're finished! But as programmers it's sometimes handy to include private notes or aides memoire within the coding. The browser will simply ignore anything within <!-- and -->. So it may be handy to include something like <!-- This is the first version of the MyFirst.html listing. -->, somewhere, but right at the start or right at the end would be usual. Many folk include a revision date as a comment.
Now for a bit of a shock perhaps. We've been using TWO languages - html that we knew about and also CSS3. CSS stands for Cascading Style Sheets, and the latest version is CSS3. The basic idea is that we've been using html mainly to say WHAT is to be included on our website - the text and the picture and the horizontal line. And we've been using CSS to explain HOW we wanted those features to be displayed. Chapter 1 was entirely html: Chapter 2 has been mainly CSS. (The distinction is not total: <i> for italics and suchlike instructions are html controlling appearance.)
You may have noticed that several of the links we've referred to above include CSS in their addresses. Helpful sites include:
https://www.w3schools.com/html/ is the start of the official w3.org tuition pages. It has scores of links to details, both in the main display and from the menu column on the left.
https://www.cssportal.com/ is the home page giving access to CSS information.
https://developer.mozilla.org/en-US/docs/Web and https://developer.mozilla.org/en-US/docs/Web/CSS are similarly useful for us beginners.
BUT - and it's a big "but" - we've used CSS in only one of three totally different ways.
- We've simply added style specifications to the lines of text that featured the items involved such as text layout, picture border and so on. This is referred to as "in-line CSS". It's probably the easiest way of dealing with a one-page single-division website like the one we've been developing.
- But what if we're concerned with a more elaborate page with a whole collection of photos or other pictures for example. We wouldn't want to have to type style="border-style: solid; border-width: 8px; border-color: red;" for every one, would we? - even with copy and paste! How much more useful it would be to have appropriate instructions to say that EVERY img anywhere in the page is to be styled in the same way that we specify. This can be done with an "internal style sheet" included in the head. We'll see how in just a moment.
- Better still, what if we're concerned with a big website with lots of pages? Might it be possible to have some quick and easy way of making sure that every picture on the whole website is bordered in the way we like; that the same font style is used for text on every page; that the backgrounds and page layouts present a consistant image to our customers or whoever? Yes! Strange as it may seem, the trick is to keep as much of the CSS as possible totally separate in its own "external style sheet" file. So long as (a) that CSS file is in the same directory as the web page in question and (b) the coding in the head of that web page refers to that CSS file all will be well. The required style then 'cascades' over all the designated pages. (It can mean copying the CSS file into a number of web page folders - yes, folders - regardless of how many html files are in each folder.) All our later Chapters provide examples.
But now we've got to learn how to build a very simple internal style sheet that will achieve the same results as the inline commands we've used up to now. It all goes in the head section, like this -
<style>
body { text-align:center; font-size:40px; color:navy; background-color:#f5f788; }
img { border-style: solid; border-width: 8px; border-color: red; }
hr { border-style: solid; border-width: 10px; border-color: navy; }
</style>
You can see that each line consists of
• what it applies to (body, img, ...)
• { (in place of =" used previously)
• the now-almost-familiar CSS itself
• }
To follow suit with your listing it may be best to make the additions, delete the redundant inline commands, and save the new version under a new name. Including a new comment, my version reads -
<!DOCTYPE html>
<html lang="en">
<head>
<meta http-equiv="Content-Type" content="text/html;charset=utf-8">
<title>My First Trial Website</title>
<meta name="description" content="My first exploration with writing html.">
<style>
body { text-align:center; font-size:40px; color:navy; background-color:#f5f788; }
img { border-style: solid; border-width: 8px; border-color: red; }
hr { border-style: solid; border-width: 10px; border-color: navy; }
</style>
</head>
<body>
<div>
My name is
<h1 style="color:red;">Mike Hosken</h1>
This is in my local nature reserve<br><br>
<img src="beechwoods.jpg" width="600" alt="Walkers in the beech woods.">
<br>
<hr>
</div>
</body>
</html>
<!-- This is the internal style sheet version of the MyFirstCSS.html listing. -->
NOTE:
* One convention is to set out the CSS one thing (bracket, item, and so on) on each line: ours would take up thirteen lines like that. If that's what you would prefer, go to it: we may have second thoughts later on anyway. It makes no difference to the effectiveness.
We'll start a new, bigger project in Chapter 3 >
<<<<<<<<<<+>>>>>>>>>>