What we learned about
Not all the details are significant. But it started off with mysterious indoor puddles on the work surface below the kitchen window. Come to think of it, it had been a rough stormy night. Subsequent heavy rain caused no problem: it seemed to be just with south-westerly gales that water might, or might not appear.OUR PARK HOME ROOF
Over months I sought advice from sundry experts. The final outcome came in July, 2026, with my struggling up to the limit of my stepladder to be able to glimpse holes in and nails sticking out of the edge 'tiles' of the roof itself. A plan of action became possible.
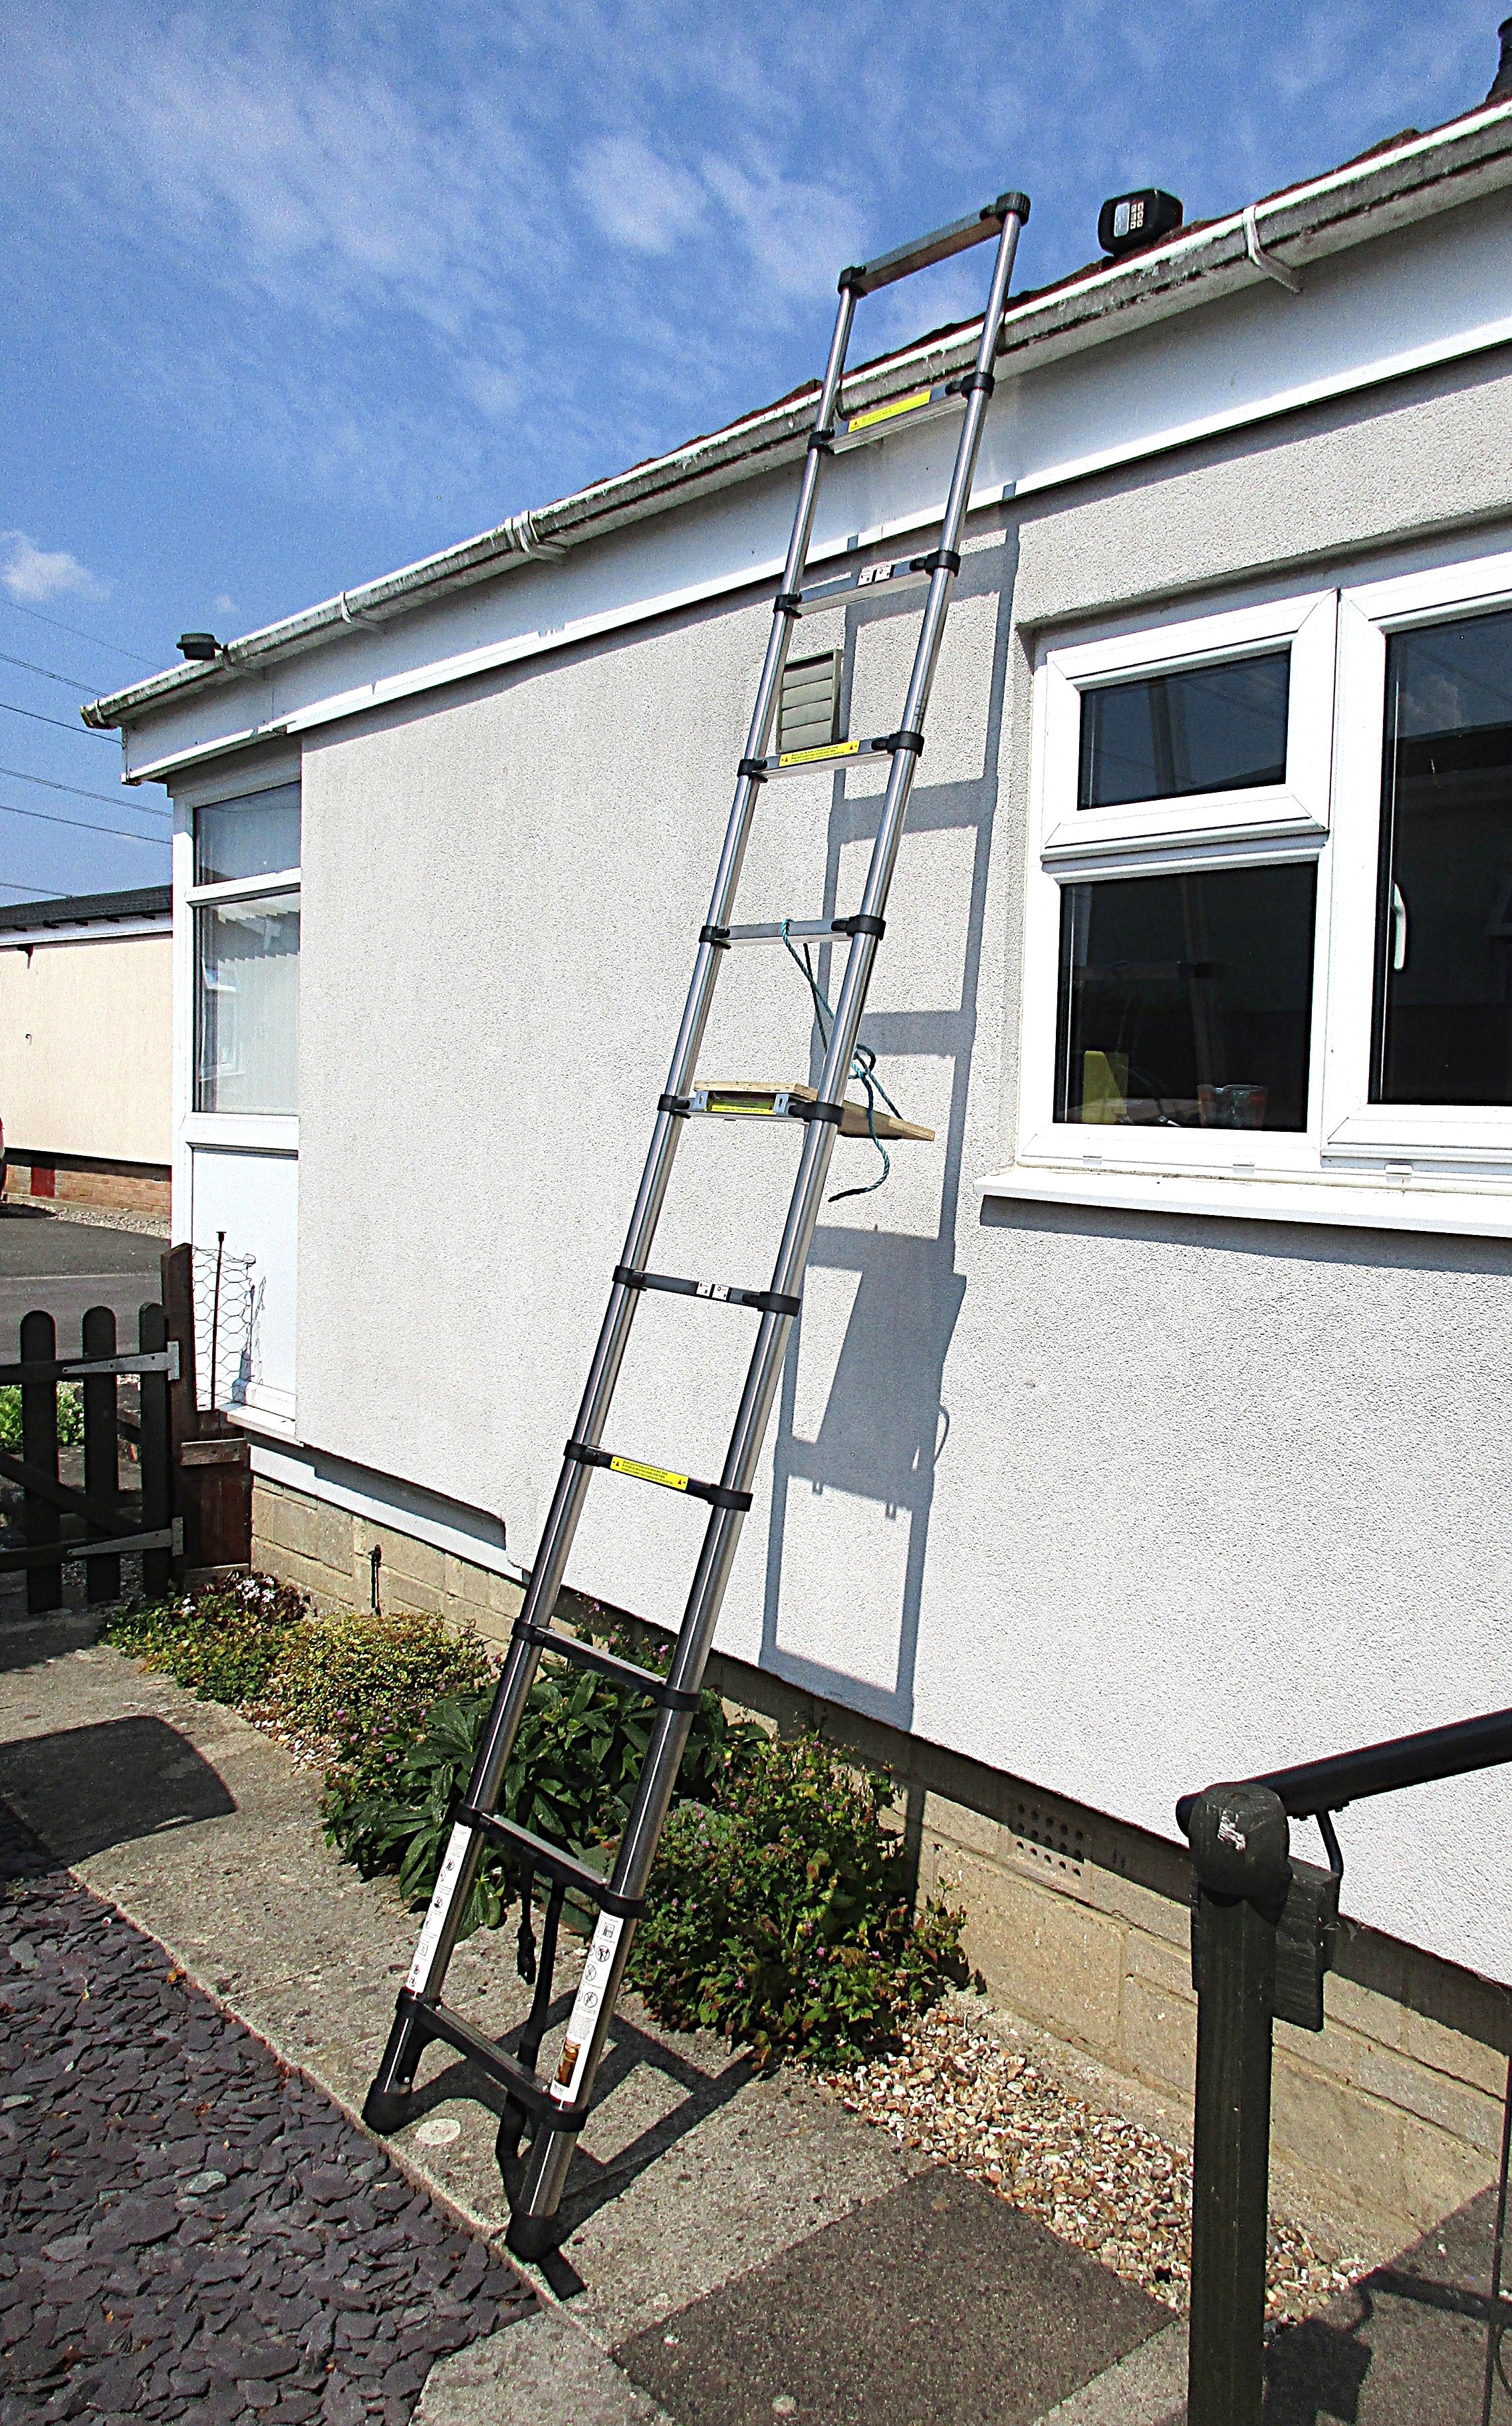 This was a serious matter and required easier access to the potential work area. Could I borrow a proper ladder, or should I invest in one of my own? (a) I don't like borrowing and (b) there may be future recurrences - or sensible routine inspections to prevent recurrences. An easy decision. Amazon came up trumps, delivering a stainless steel telescopic 3.2 metre ladder the very next afternoon (without 'Prime'!) for £49.99.
 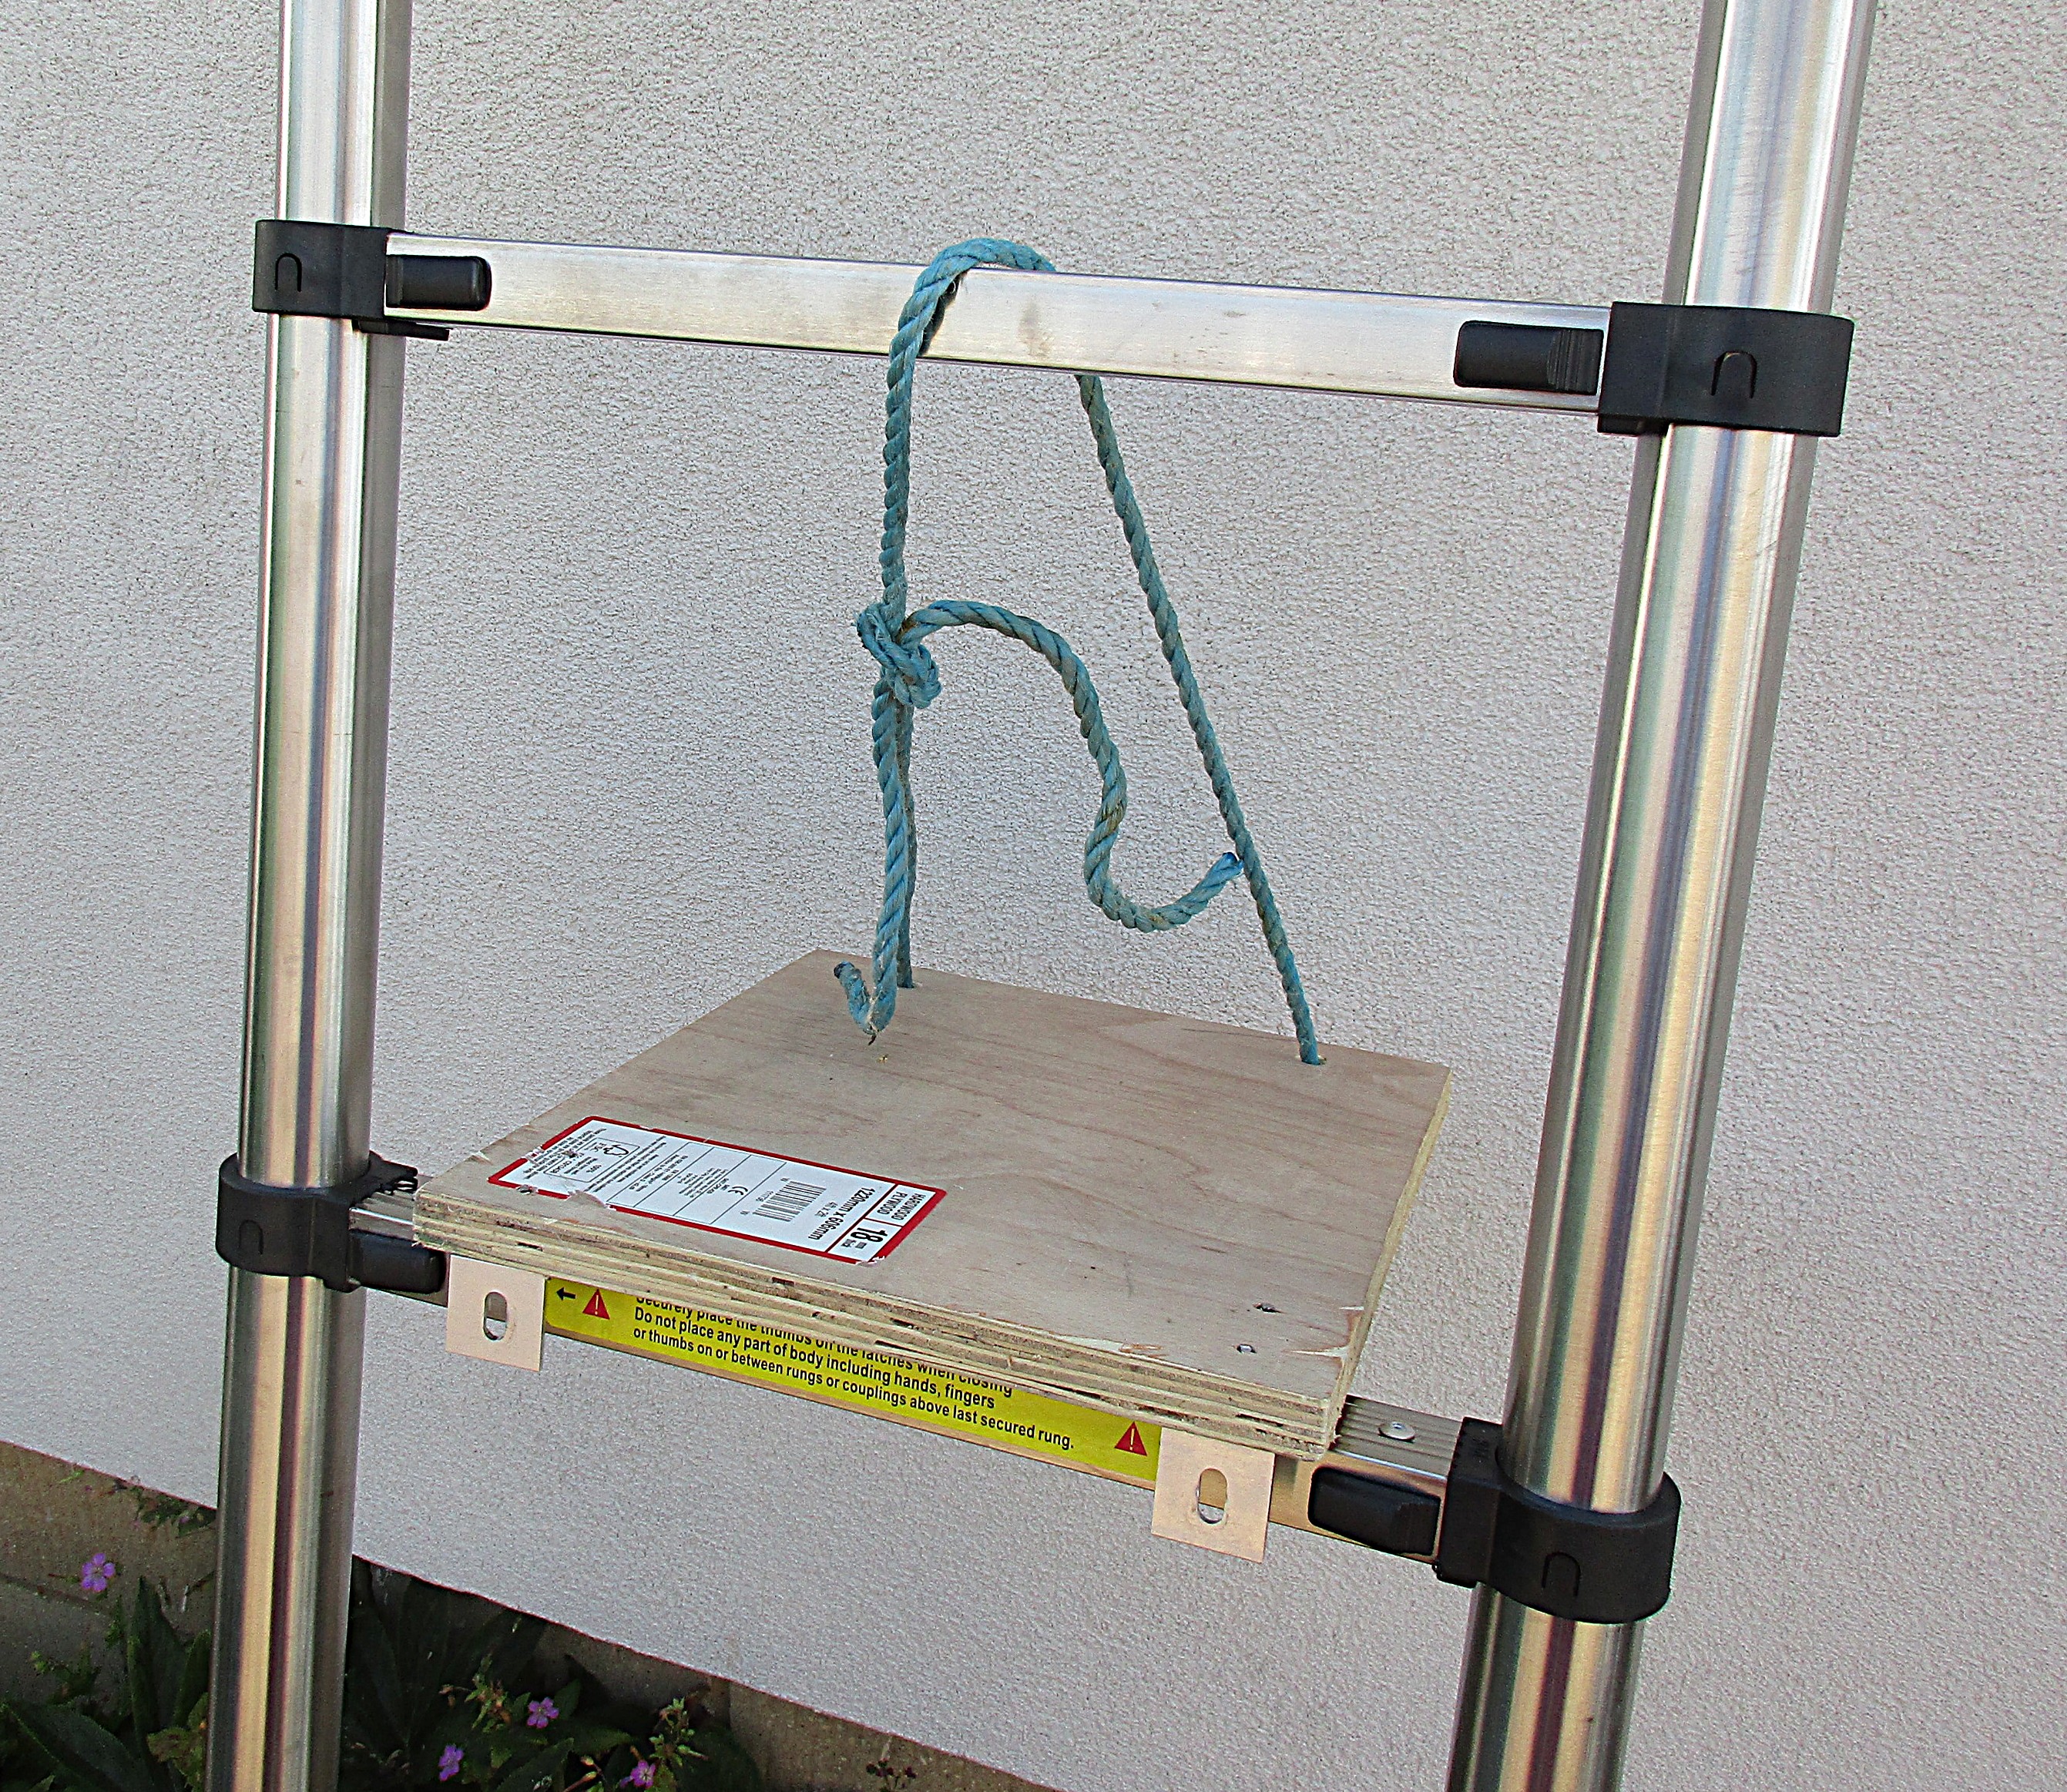 But I still hate balancing on one rung of any ladder, so, using materials hanging around within my garage/workshop I contrived a stand-on platform based on a design derived from one I had had many decades earlier, in Suffolk. I was all set.
And this is what I discovered.
My roof is made up of a pattern of 'tiles' each simulating a group of seven traditional ceramic pantiles. As with any roof, the top row of 'tiles' drains down onto the next-lower row of 'tiles' with the final, lowest row dripping into the gutter. Now, what is interesting about my roof is that ALL the 'tiles' OTHER THAN THE LOWEST ROW are secured to the underlying wooden structures with nails driven in to the slightly down-facing partly sheltered bottom 'skirt' of each 'tile'. I could see no evidence whatever of any damage or weathering deterioration.
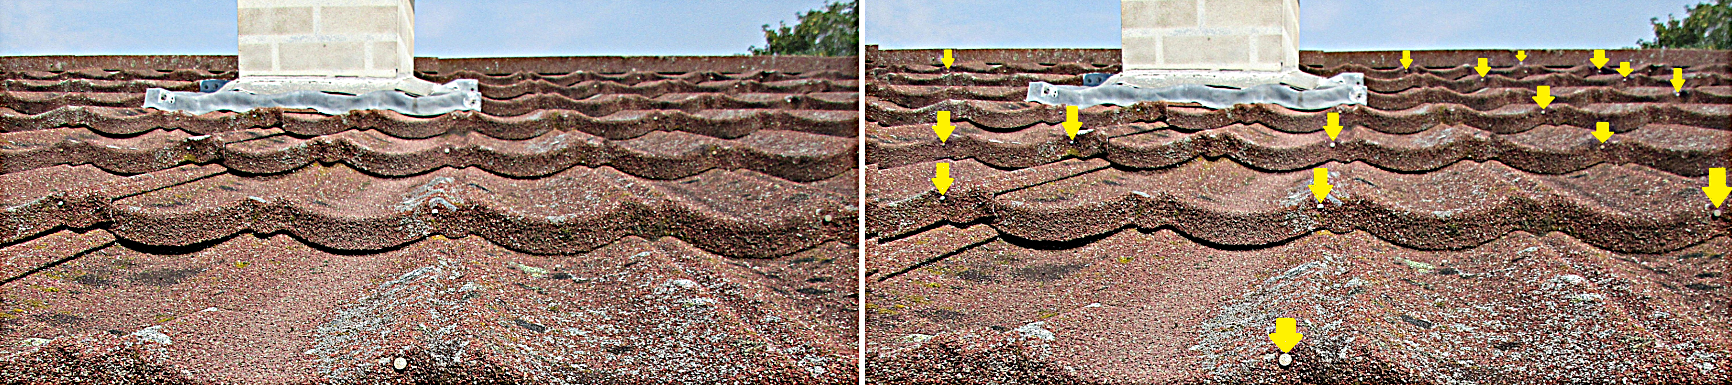
But the bottom row, overlapping the gutter, could not be secured in that way. Instead, nails had been driven through the top surface vertically (almost) down into the wood structures. Those nails and their entrance holes had endured maximal exposure to decades of rain and snow, of freeze and thaw. There was also the raising effect of some storm-strength winds tending to lift the outer edges of the 'tiles' hanging over the gutters. Two or three nails had loosened, allowing water to seep down, rotting their anchorage, as evidenced now by the fact that I could lift the lower edge of one 'tile'.
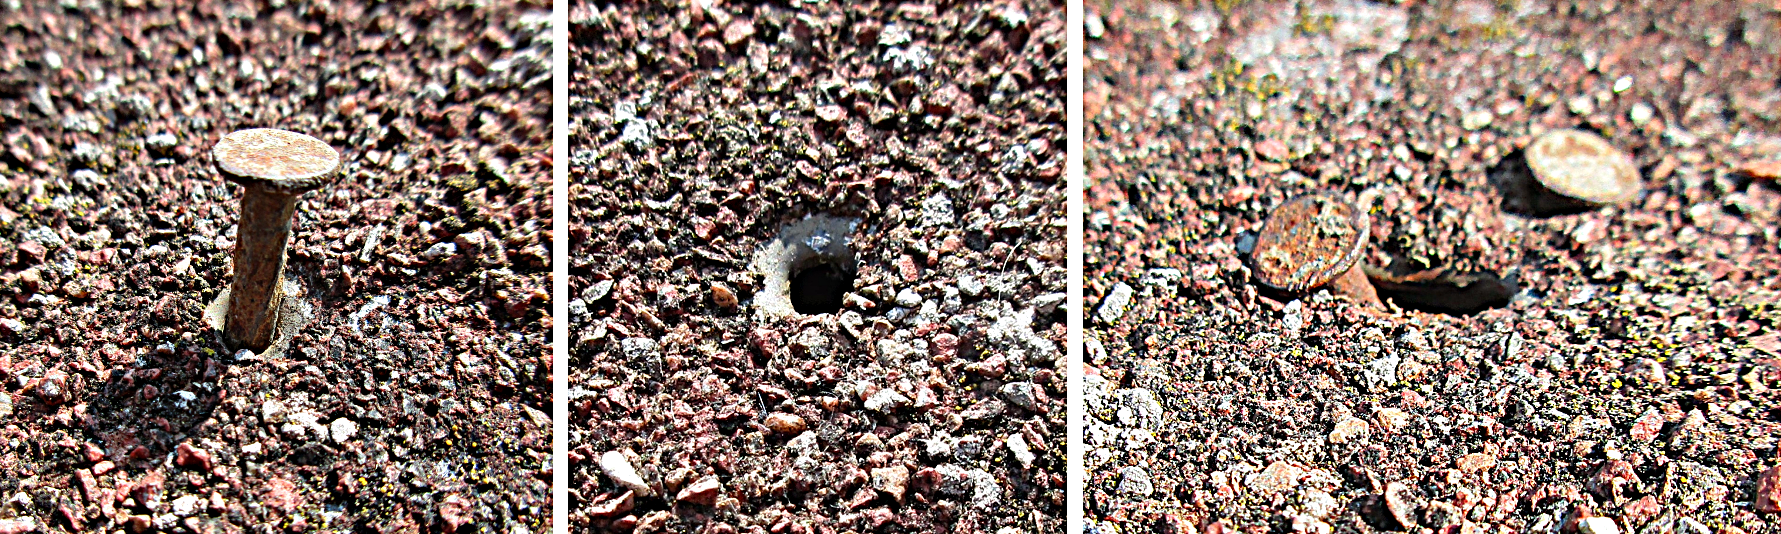
Given my new tolerably convenient access, it was but a modest d-i-y job to effect a remedy. Withdrawing and discarding the loose nails, in one case its replacement with a 5cm wood screw and washer proved effective. In other cases rotting meant that a screw had no bite, so a new hole had to be drilled and the 'tile' secured with a similar screw and washer.
 Finally, all unoccupied holes were blocked with sealant - and the new screw heads and washers covered for good measure too.
That experience plus some online research has taught some useful lessons. Each 'tile' is basically an oblong patch of corrugated iron as used on farm buildings but with much more sophisticated anti-corrosion layers added (plus the decorative stone-effect surface of course). My impression is that it is virtually impossible for undamaged 'tiles' to leak. In my case it was a design flaw which made it necessary to secure the lowest row of 'tiles' with ordinary nails through the crucial weathering surface itself. (On corrugated iron roofs each nail is a substantial item inserted through a RIDGE CREST and fitted with a flexible plastic WASHER, certainly not just nails in the valleys.)
In short, I have a lot of respect for my 'tiles' but detect a need for the utmost care as regards the fixings of the lowest row, above the gutter. Once I'd got my energy back, I returned to the scene of operations and put a dab of sealant on every one of the exposed nail heads around that whole bottom row of my 'tiles', along the east side and west side. Then a few days later, when I was certain that the sealant had set, and after collecting the necessaries from Screwfix, came the final stage. I systematically checked that all the lowest 'tiles' were firmly secured. They weren't. I used seventeen of my specially purchased stainless steel screws with stainless steel washers to make good wherever I had any doubt about reliable security. A minimal hole was drilled in the top of an appropriate 'ridge' before each screw, with its washer, was tightened down.
I hope we'll be safe now for several years to come - but I'll make checks (or have checks made) from time to time.
<<<<<<<<<<+>>>>>>>>>>
<<<<<<<<<<+>>>>>>>>>>